BACK to How to Assemble K-D Storm Sash
Pinning The Joints
How to Install Sash Pins
When all of the joints are tight and the sash is square, the next step is to install the sash pins.
Lay the sash with the exterior (glass side) face-up on the table. If using three clamps, place one clamp under each rail, with the slotted blocks in place, tighten the clamps using moderate pressure. It helps to have an assistant when placing clamps with blocks in place, as one person can deal with each end of the clamp. If using one clamp, start at the bottom rail. Place the clamp under the bottom rail with the blocks in place.
Check to see that all of the joints are closed, then flip the sash up to see that the joints on the interior side are closed as well. Lay the sash flat again and using the pointed stick, double-check to be sure that the sash is square.
If everything is satisfactory, tighten the clamps an additional 1/8 to ¼ turn to pre-load the joints. More force is required on the wider bottom rail; less force is needed on the narrow center rail to provide even pressure. Be careful not to crush the stiles at the center rail joint by using too much force.
If using three clamps, all pin holes can be drilled in oner operation. If using one clamp, drill the holes for the bottom rail first.
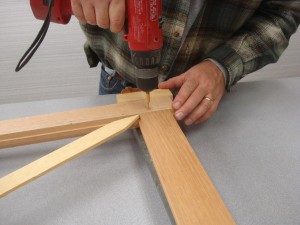
Drill 3/32” holes approx. 7/8" deep in the bottom rail joint as shown in the picture. Two holes are required for each bottom rail joint. The upper holes are located about ½” from the shoulder of the tenon and about ½” or 5/8” down from the top of the tenon. The lower holes should be drilled about ¾” from the shoulder and about ½” or 5/8” up from the bottom of the tenon. The two holes should not be placed in the same vertical line. They should also be located close to the shoulder of the tenon, and not out in the middle of the stile, in order to prevent open joints due to expansion and contraction of the stiles.
Drive the four sash pins into the bottom rail joints, and set them about 1/8” below the surface with a nail-set. When the pins are set, the clamp can be removed and relocated to the center rail. Repeat the pre-loading, drilling, and pinning operations for the center and top rails. The center and top rails only have one pin per joint, which should be located about ½” from the shoulder and centered in the width of the tenon. See pictures for illustration.
Click on images below to view at larger size.

Drilling Holes in Bottom Rail Joint for Sash Pins |

Driving In Pins |

Setting Pins Below Surface with Nail Set |

Drilling Hole for Pinning Top Rail with One Pin In Each Joint. Center Rail Pinned Similarly. |

